What Remesh Does
While Remesh runs, the status bar names the step the engine is on. This page lists those steps in the order they run, says what each does to the mesh, and shows what it produced. The pictures follow one part, a housing with a boss, remeshed to 2000 quads with Hard Surface. Steps that only exist with drawn guides use the sample head.
Not every step runs every time. A mesh with no guides skips the guide steps. A mesh that needs no simplifying passes that step in no time. The bar never goes back, but a step name can come back when the engine tries again.
Your mesh is read and prepared
The first three steps get the mesh into a shape the later steps can work with.
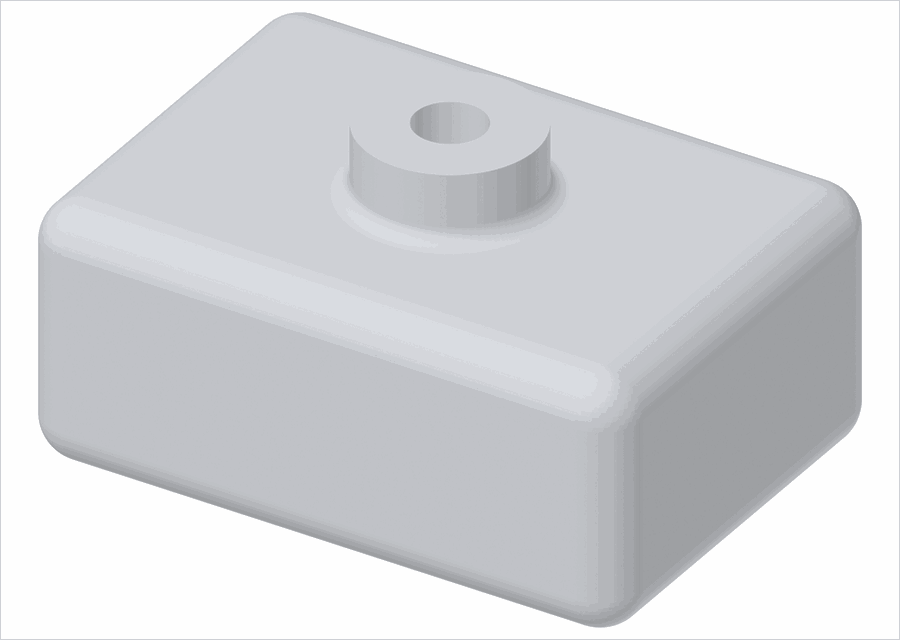
The input: the mesh as Blender hands it over.
- Reading mesh
- Reads the mesh. Doubled vertices are welded, collapsed and duplicate faces are dropped, faces that point the wrong way are turned, and every face is cut into triangles.
- Simplifying
-
Only for dense meshes (scans, subdivided sculpts). Reduces the mesh to a working resolution, about twenty triangles for each quad you asked for, and keeps the sharp edges. A mesh that is not dense passes this step at once.
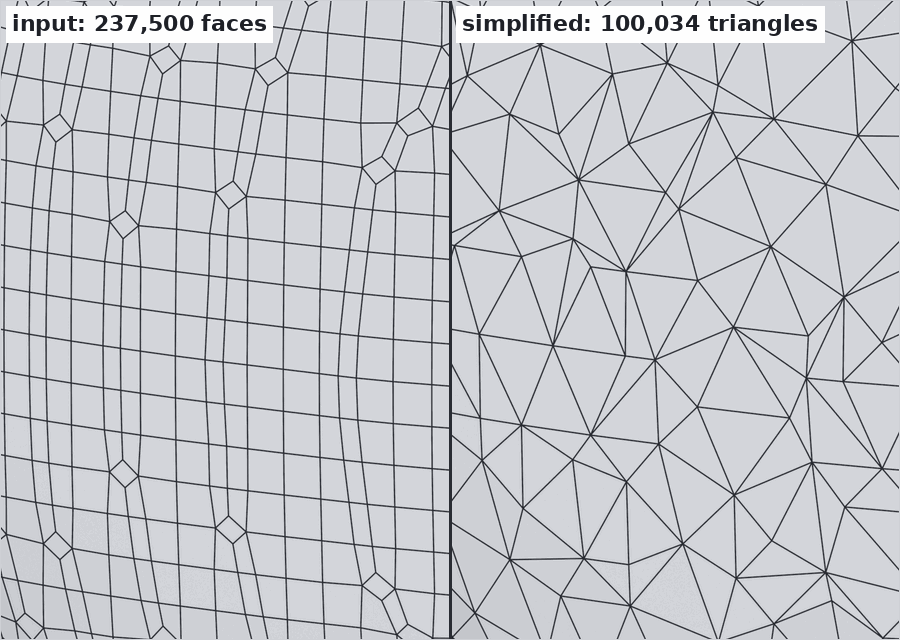
The same patch of the sample head before and after. The simplified mesh has far fewer, larger triangles and the same shape.
- Building reference mesh
-
Splits triangles that are longer than half a quad, so no triangle is bigger than the quads that will be built on it. Curvature and sharp edges are measured on your original mesh first, so nothing is lost. This step takes a visible share of the time on a mesh with many faces.
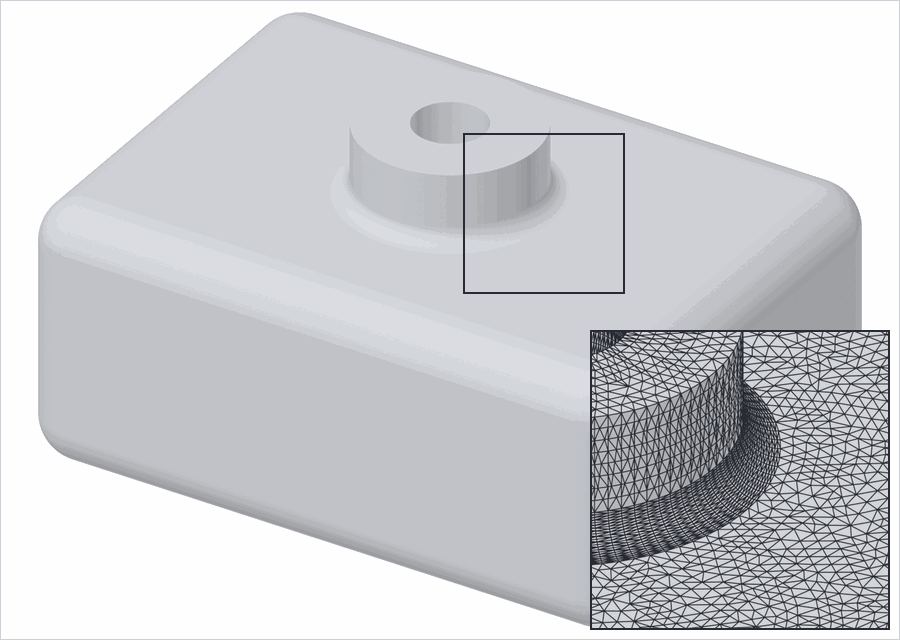
The reference mesh. The close-up shows the triangles the next steps work on.
The engine looks at the shape
- Detecting features
-
Finds the sharp edges: where two faces meet at an angle larger than the hard edge angle, at the borders of materials when Use Materials is on, and along the guides you drew. The quads will follow these lines.
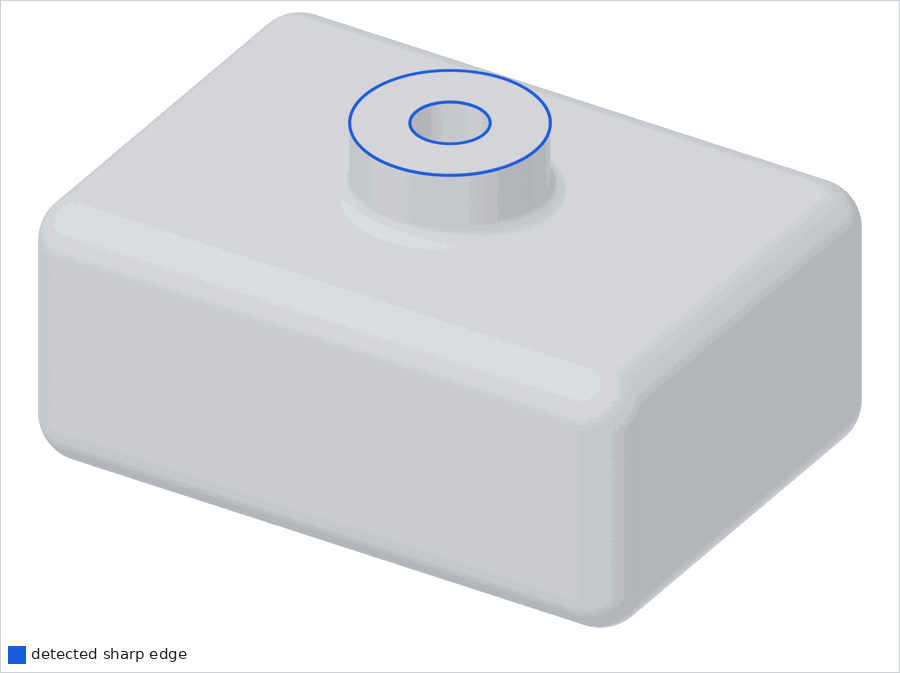
Detected sharp edges, in blue. The rounded edges are smooth and are not marked.
- Measuring curvature
- Measures how the surface bends. This is quick.
- Solving cross field
-
Decides, for every triangle, which way the quad edges should run. Each triangle gets two directions at right angles to each other, a cross. The directions follow the sharp edges and change smoothly in between. Where they cannot line up everywhere, the field has a pole, a spot where the grid will have a vertex with three or five edges instead of four.
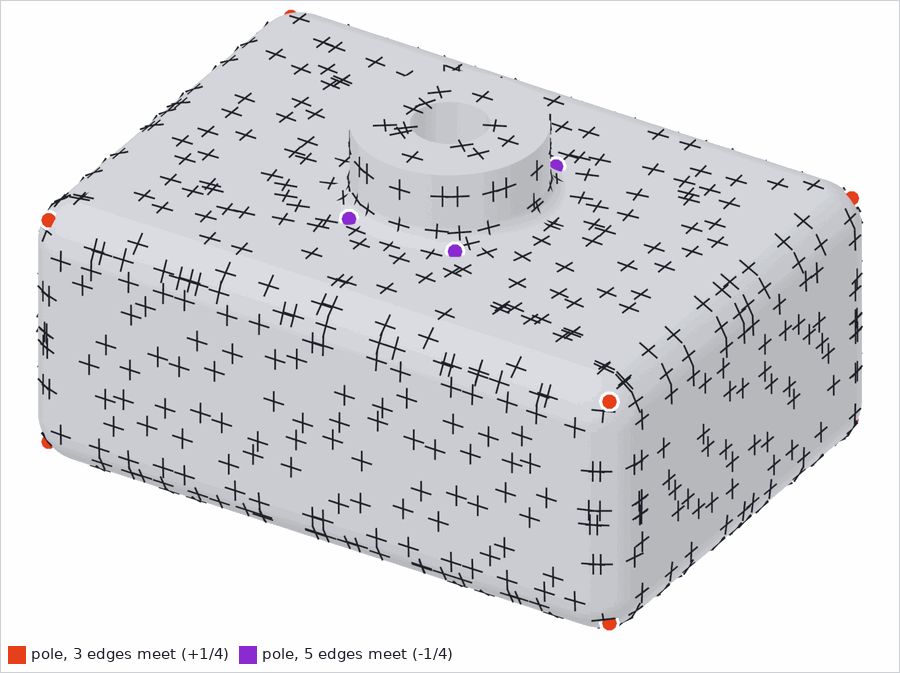
One cross for each small patch of the surface. The dots are the poles: orange where three edges will meet, purple where five will.
For the curious: this is a cross field, and its poles are called singularities.
- Solving size field
-
Decides how large the quads should be at each spot. Quads are smaller where the surface curves sharply and larger on flat areas, and the total comes to the count you asked for. When guides or density painting are used, the size is already part of the previous step and this one finishes at once.
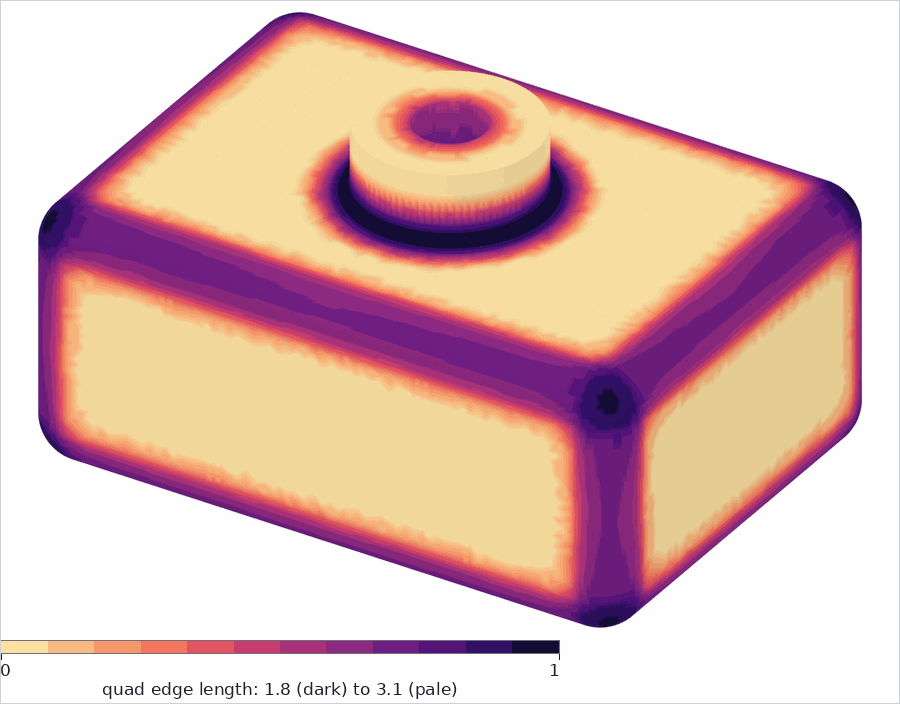
Dark where the quads will be small, pale where they will be large.
The quads are laid out
- Solving integer grid
-
The longest step on most meshes. It lays a grid of squares over the whole surface, with the squares running along the directions of the cross field and as large as the size field says. Then it rounds the grid so that every edge line has a whole number of quads on it and lines that meet agree with each other.
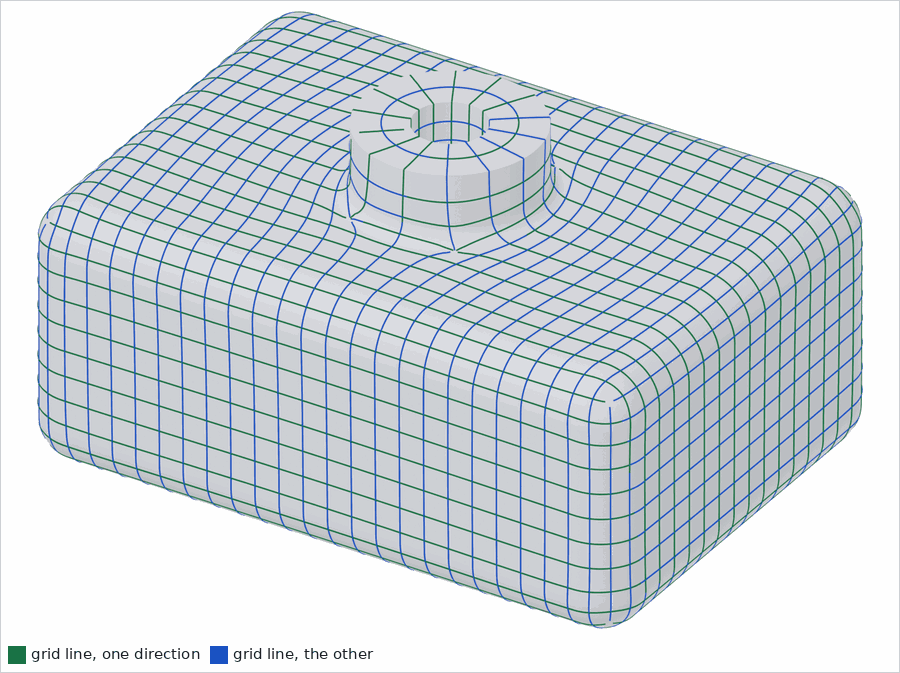
The grid on the surface, one direction in green and the other in blue.
The engine then cuts the surface into blocks along the grid lines that start at the poles and at sharp edges, and checks that each block can be filled with whole rows of quads. If some block cannot, it is not accepted and the engine rounds the grid another way (see Trying variants below).
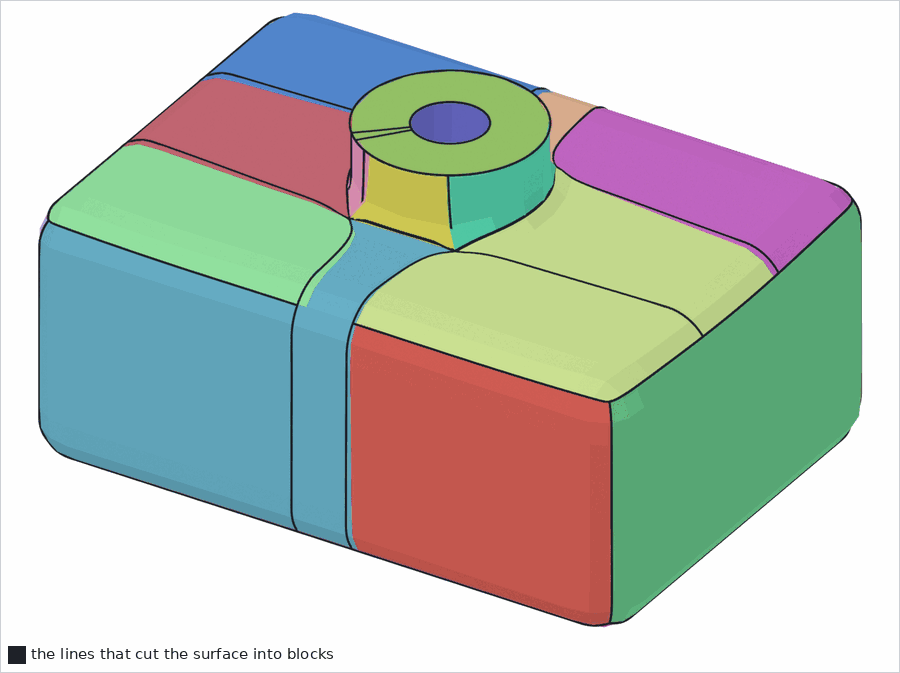
The lines that cut the surface into blocks, and the blocks in different colors. The colors are drawn from the finished quads, so a few small blocks at the rounded edges are shown merged.
For the curious: the grid is an integer-grid map, and the blocks come from a motorcycle graph.
- Extracting quads
-
Reads the quads off the grid. Every block is filled with its rows and columns of quads, and any other polygon is made into quads.
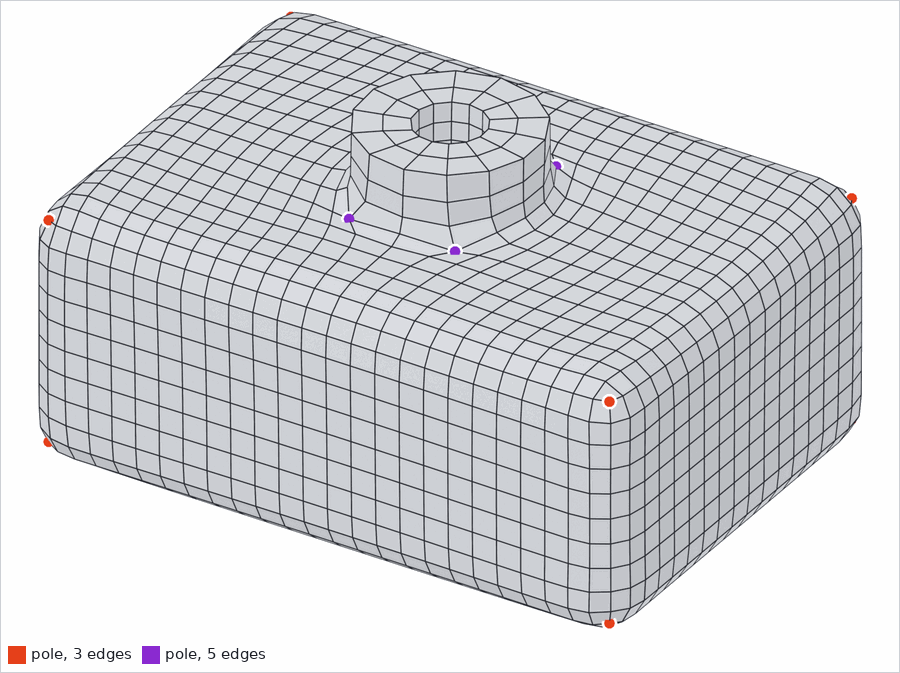
The quads as they come out of the grid. Dots are poles.
- Smoothing
-
Relaxes the quads so their corners are close to right angles and their sizes even out, while keeping them on the surface and on the sharp edges. Folded quads are untangled or collapsed.
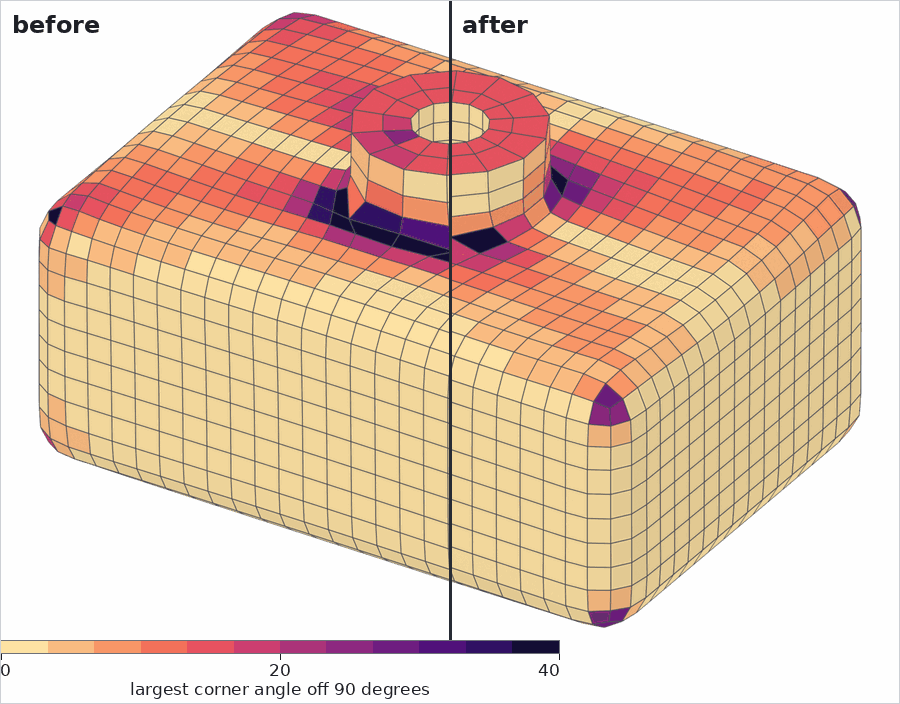
Left, before smoothing. Right, after. Dark quads have corners far from a right angle.
- Trying variants
- Only when the block layout was not accepted, and only for Hard Surface. The engine rounds the grid in four more ways, builds and smooths the quads for each, and keeps the best: first the one with the fewest folded quads, then the one that follows the sharp edges, then the one with the fewest extra poles, then the one closest to the count you asked for. It stops early once the best one has no extra poles, follows the sharp edges, and has about the count you asked for. This step can take longer than all the others together, see When it takes longer.
- Writing results
- Writes the mesh to the work folder.
The check
The engine does not show a name for the check. It starts when Writing results is done, and it has the final say: the report line then reads clean or needs correction.
The check looks for quads that are inverted or have a folded corner, holes, loose pieces, a changed shape (a hole closed or a handle lost), and sharp edges the quads do not follow. It marks the spots.
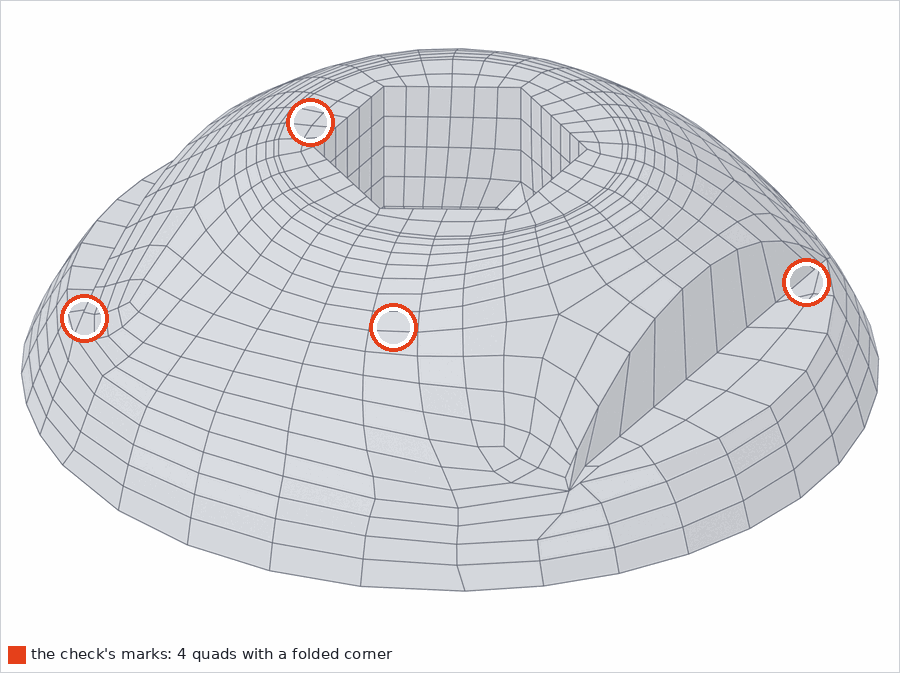
A result that needs correction: four quads with a folded corner, ringed in orange.
When the check fails, the engine first repairs the marked quads and the ring of quads around them, and checks again. A repair is kept only if the result then passes, and it is refused when it would move the surface away from the part or lose sharp edges. If it does not pass, the engine tries the whole remesh again with a slightly different quad count, and keeps the best result. When you see the step names Reading mesh and the rest start again, this is why.
A result that still needs correction is not hidden. The add-on imports it, marks the spots, and says what is wrong in the report line.
Drawn guides
With guides, three more steps run before the engine looks at the shape.
- Embedding guide curves
-
Cuts your curves into the mesh so they become lines of edges.
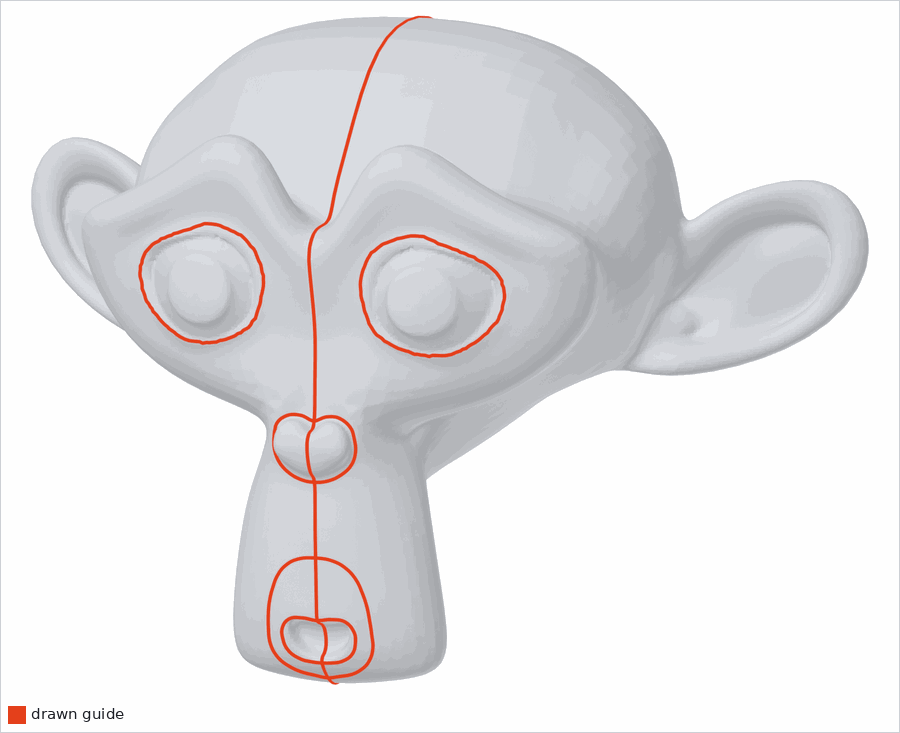
The guides on the sample head.
- Completing the layout
-
The guides cut the mesh into regions. This step adds the cuts a drawing leaves out: a line that separates nothing gets a cut across, loops that touch no other line get bridges, and regions that are uneven are cut.
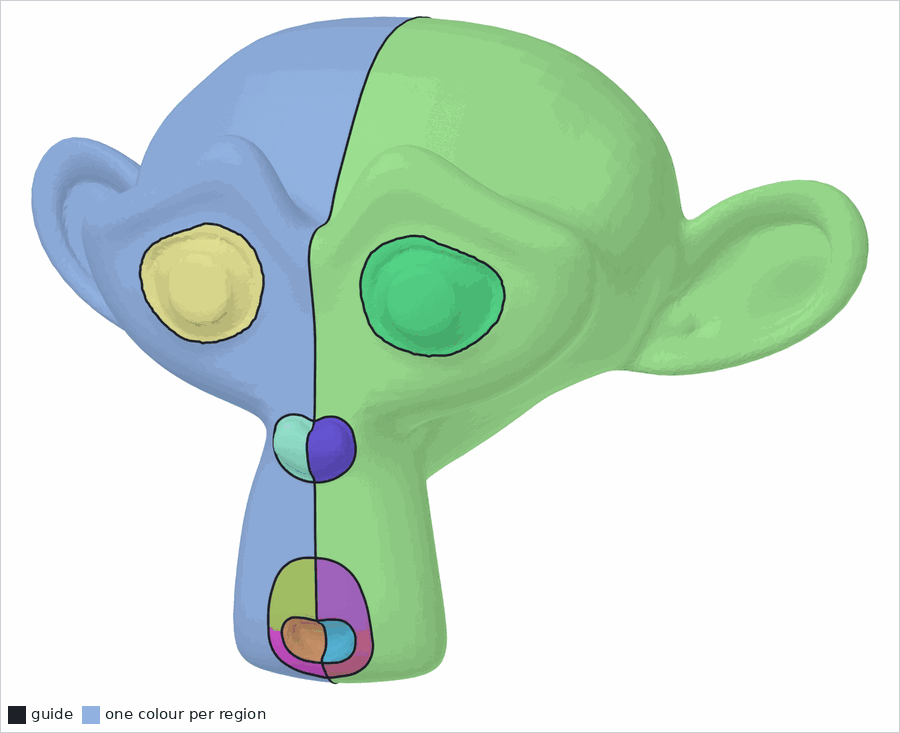
One color for each region.
- Filling the layout
-
Fills each region with a grid, a pole with spokes, or a set of rings, so the quads run along your guides. Then it checks the fill and smooths it.
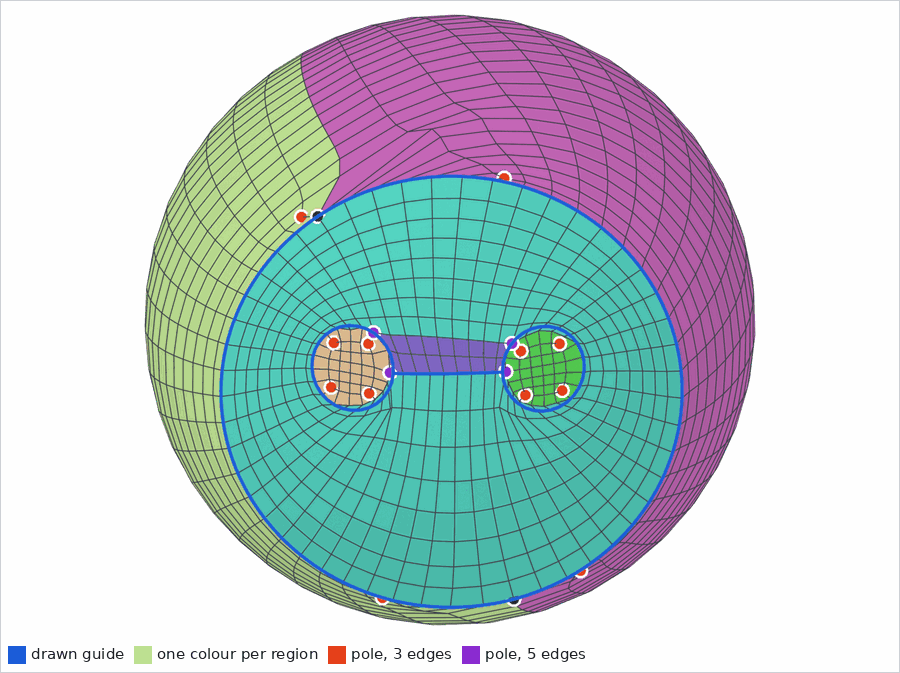
A fill: a sphere with four drawn guides, each region its own color. This is another model than the head.
When the fill cannot work, for example when a region is much bigger than its outline can hold, the engine says Trying the field-aligned remesh. It remeshes the whole mesh with the steps above, with your guides as lines to follow instead of exact borders. This takes about as long again, and it is the reason a guided remesh can take twice as long as the fill alone.
What the add-on does around the engine
Before the engine starts, the add-on writes the mesh and the guides to a work folder. After it ends, the add-on does a few more things, and the status bar names some of them.
- filling the open regions
- Regions of a guided fill that came out much coarser than the rest are remeshed freely at the size you asked for and joined to the patches around them.
- keeping your patches
- When the fill was thrown away in favor of a free remesh, the round patches of the fill are put back.
- checking the result
- The engine checks the mesh again after the add-on has changed it, for example after Mirror X made it symmetric.
Then the add-on marks the result's edges sharp and creased where they follow the hard edges of the original, copies the attributes you asked to keep, and writes the report line: clean with the number of quads and poles, or needs correction with the problems in plain words.
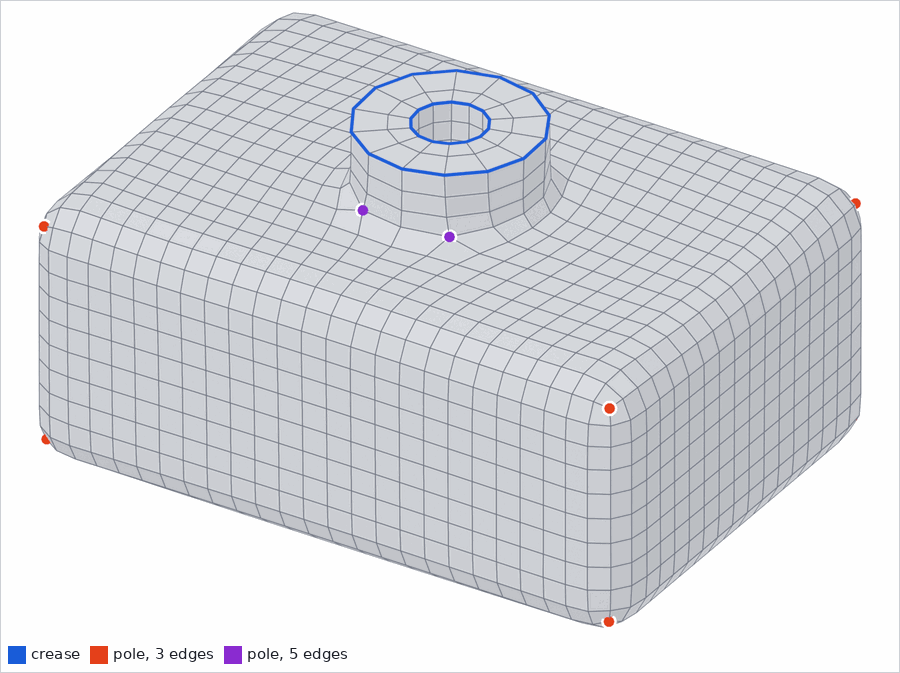
The finished result. Creases in blue, poles as dots.
When it takes longer
A remesh takes from a few seconds to over a minute. Three situations make the progress bar slow down, and the step name tells you which one.
Note
The numbers below were measured on one model on a busy computer, to show the size of the effect. Other models and other computers give other numbers.
- Dense meshes
- A mesh with far more triangles than quads asked for is simplified first (Simplifying). That is quick for a few hundred thousand triangles and grows with the size of the mesh.
- Drawn guides
- The fill tries every region, and when it fails the engine remeshes the whole mesh once more. In one measurement on the sample head, the fill took 16 s and the free remesh after it 18 s.
- The block layout is not accepted
-
This is the slow case, and it happens on parts with many sharp edges and cuts. The grid is rounded another way, and then four more variants are tried (Trying variants, with a count such as "2 of 5"). Each variant solves the grid again from the middle of the solve on, and extracts and smooths its quads. On a CAD cap with 92 000 triangles each variant took 17 to 21 s, and the whole step 73 s of a run of 97 s. On other runs of the same cap each variant took 17 to 40 s, and the run 73 to 120 s.
The result is usually better for the wait: in that run the five variants had between 3 and 9 extra poles and 2 to 4 folded quads, and the one kept had 3 extra poles and 2 folded quads. The step stops as soon as the best variant is clean, so it runs fully only when none is.
You can do the following:
- Wait. The bar moves on after the step. Esc cancels the run.
- Change Quads a little. A different count can give a layout that is accepted. It is not certain to.
- Use Prepare CAD Part on a CAD part. Each surface then gets its own grid and its own border, which gives the engine more to follow, see Technical Meshes (CAD).
- For an organic mesh, the Organic style does not try variants. It is faster and may keep more extra poles.
The engine does not try variants for a mesh with more than 100 000 triangles after refining. That mesh gets the first rounding only.